InvenTrack User Guide
Your Journey to Easier Inventory Management Starts Here! 📦
As an inventory manager, advanced technical skills aren’t necessary to use Inventrack effectively. This guide will help you quickly understand and apply its essential features, making it easier to streamline your daily tasks. Since your main goal is accurate, efficient inventory tracking, we’ve kept instructions clear and practical, focusing on what you need to manage your store’s stock seamlessly.
🎯 Fast and Easy to Use: If you’re comfortable with typing, navigating Inventrack will be especially intuitive!
With InvenTrack, you can:
- Add and manage suppliers and products in your inventory.
- Keep track of which suppliers provide which products.
- Monitor and update stock levels of the products in the system.
Table of Contents
- Quick Start
- Notes about command format
- Prefixes Glossary
- Features
- Viewing Help
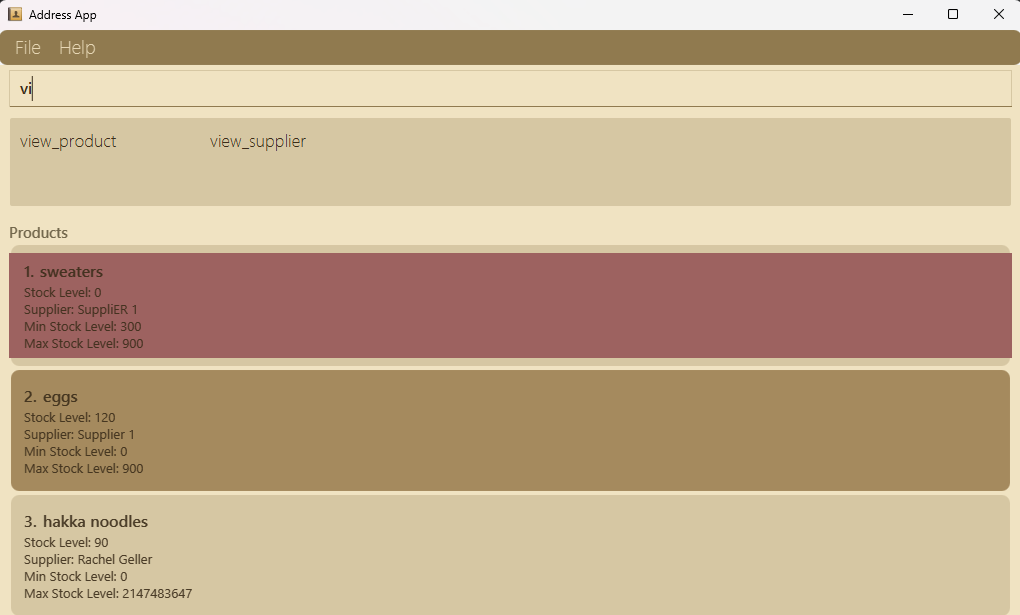
- Autocomplete
- Adding a supplier
- Adding a product
- Assigning a product to supplier
- Unassigning product from a supplier
- Setting threshold for a product
- Updating stock level of a product
- Locating all suppliers
- Locating all products
- Deleting a supplier
- Deleting a product
- Clearing all entries
- Exiting the app
- Saving the data
- Editing the data file
- Upcoming features
- FAQ
- Known Issues
- Command Summary
Quick Start
Step 1: Install Java
Before you can use InvenTrack, ensure you have Java version 17 or above installed in your Computer. Java helps you to run our app in your desktop.
To check if Java is installed:
- Open a command terminal using
cmdin search (Command Prompt on Windows, Terminal on macOS/Linux).
Alternate way to open terminal: right-click on the opened folder or desktop, selectOpen in terminaloption. - Type the following command and press Enter:
java -version
If Java is installed, you should see the version number.
If Java is not installed, download it from the official website.
Step 2: Download InvenTrack
- Get the latest version of InvenTrack by downloading the
.jarfile from here. - Move the .jar file into the folder where you want to store your InvenTrack data (this will be your "home folder").
Step 3: Navigate to the Folder
To run InvenTrack, you need to open your command terminal and navigate to the folder where you saved the .jar file:
- Open a terminal (Command Prompt on Windows or Terminal on macOS/Linux).
- Use the
cdcommand to change to the folder containing the.jarfile. For example:- On Windows:
cd Desktop\InvenTrack - On macOS/Linux:
cd ~/Desktop/InvenTrack
(e.g. InvenTrack) - On Windows:
Step 4: Run the Application
To launch the application:
- After step 3, type the following command and press Enter:
java -jar inventrack.jar - After a few seconds, the InvenTrack application should open. A window similar to the one below should appear (note that some sample data may be pre-loaded in the app):

Step 5: Start Using InvenTrack
You can now start using the application by typing commands into the command box. For example:
add_supplier n/Kayla Beauty p/98136450 e/kaylab@hotmail.com a/Phoenix Cross Road, Hilton Avenue 6: Adds a supplier named Kayla Beauty with respective phone, email and address.add_product n/Corn flour stk/50Adds product named Corn flour with current stock level as 50view_product: Helps you to view the current products in the system.view_supplier: Lets you see the list of suppliers currently in the system.delete_supplier n/Kayla Beauty: Deletes the supplier with the name 'Kayla Beauty'clear: Deletes all the information about the suppliers and products in the system completely.exit: Helps you to exit the app.
Refer to the Features below to know more about the commands you could use in this app.
Notes about the command format and other information:
⚠️ Placeholders in UPPER_CASE
Words like
PRODUCT_NAMEandSUPPLIER_NAMEare placeholders for information you need to provide.
- Example: For
add_product n/PRODUCT_NAME, replace the placeholder with actual values, such asadd_product n/Apples.📘 Optional Items in Square Brackets
Items in square brackets are optional.
- Example:
add_product n/PRODUCT_NAME [stk/STOCK_LEVEL]can be used asadd_product n/Applesor asadd_product n/Apples stk/50.🔁 Repeating Items with
…Items followed by
…can be used multiple times or omitted.
- Example:
[t/TAG]…can be used as(0 times),t/beverage, ort/beverage t/important, etc.❗ Extraneous Parameters Ignored
Commands that do not require parameters (such as
help,exit, andclear) will ignore any extra inputs.
- Example: Typing
help 123orhelp -10will be interpreted ashelp.📦 Setting Current Stock to be Greater than Maximum Threshold
- MAX_STOCK_LEVEL is the maximum number of products you would like to have in your store for a particular product, so it might happen that CURRENT_STOCK_LEVEL maybe greater than the former because of greater number of purchase order. This helps to suit real world implementation.
- Parameter Order: Parameters can be entered in any order.
- Commands are Case-Insensitive: Commands such as
helpandHELPare recognized as the same.
🖨️ Copying Commands from PDFs: If you’re copying commands from a PDF, note that spaces at line breaks may be omitted when pasted, so double-check the spacing.
Prefixes Glossary:
n/: Represents the name of a supplier or product.pr/: Refers to product.su/: Represents a supplier.p/: Used for the phone number of a supplier.e/: Represents the email address of a supplier.a/: Used for the address of a supplier.t/: Stands for tags that can be added to either suppliers or products.stk/: Indicates the stock level of a product.min/: Represents the minimum stock level of a product.max/: Represents the maximum stock level of a product.
Features
Viewing help : help 🤝
Stuck on how to use the app?
The Help command simplifies the process for you!
It opens a pop-up window containing a message to copy the link to the user guide, allowing you to learn more about the application.
Format: help
Autocomplete : 🤖
Want the app to automatically complete the commands, supplier name or the product names you want?
- Just press tab button on your keyboard to see the information.
- If there is exactly one matching autocomplete option, it'll perform the completion automatically!
pr/ or su/ currently.
Adding a supplier: add_supplier 🙋♂️🙋♀️
First let us add your suppliers into the system.
To do this, use the given command format:
Format: add_supplier n/NAME p/PHONE_NUMBER e/EMAIL a/ADDRESS [t/TAG]…
Here are a few examples to help you:
add_supplier n/Fresh Farms Ltd p/98765432 e/contact@freshfarms.com a/23 Orchard Street, Suite 5add_supplier n/Global Produce Inc e/globalproduce@example.com p/1234567 a/789 Harvest Ave, Level 2 t/Organic
- A supplier can have any number of tags (including 0).
- Currently, there is no restriction in phone number format, so you can use numbers like (+65) 97136544 or even +91-97664 23668, according to any country-specific format you prefer.
- Email can be the same if different people from same company use same work email hence we don't check for duplicate in emails and phone number too, It is intended for future enhancements.
- No value allows usage of "/", so if you want to use "S/O" in names, it's better to use alternatives like "son of," as there is no length restriction for names.
- If you want to see the supplier you have added, use view_supplier to switch panel, as currently the UI would not show newly added supplier information.
Adding a product : add_product 🧶
Now, let us add the products supplied in your store. This command will help you add the product information into the system.
Format: add_product n/NAME [stk/STOCK_LEVEL] [su/SUPPLIER_NAME] [t/TAG]…
Here are a few examples to help you:
add_product n/sweatersAdds product named sweatersadd_product n/eggs stk/120Adds product named eggs with current stock level as 120add_product n/hakka noodles stk/90 su/Rachel GellerAdds product named hakka noodles with current stock level as 90 and is assigned to supplier Rachel Geller
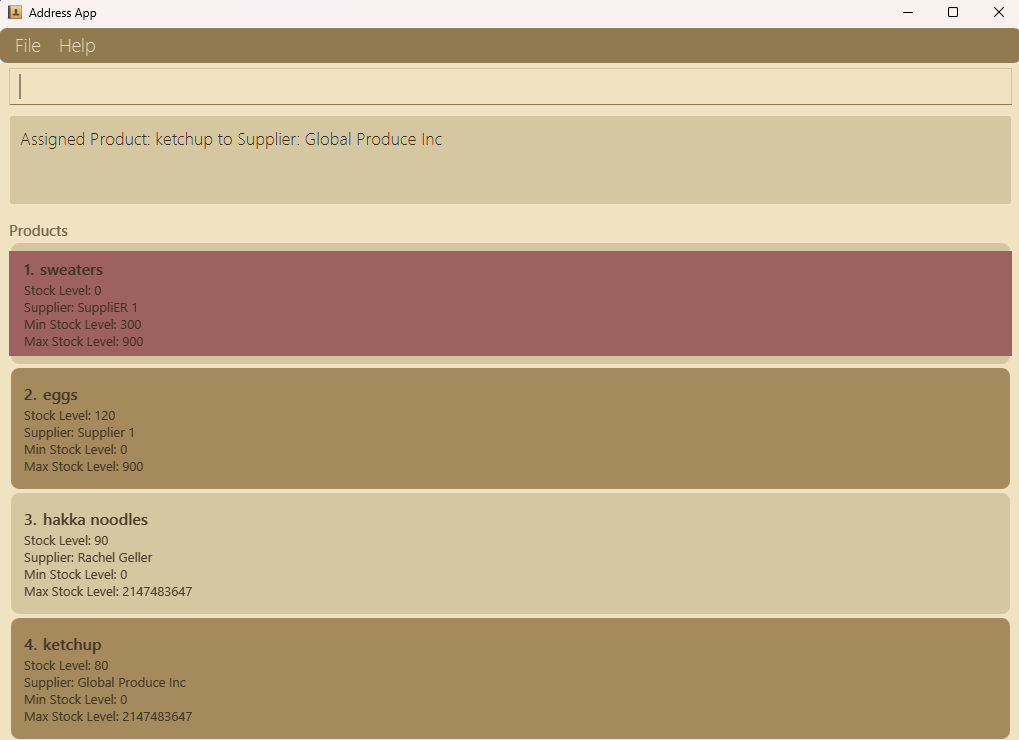
Assigning a product to supplier: assign ➡️ 🙋♀️
This feature allows you to connect products with their current supplier. This makes it easier to track which supplier is responsible for supplying each product in your store.
Format: assign pr/PRODUCT_NAME su/SUPPLIER_NAME
Here are a few examples to help you:
assign pr/Tissue Paper su/Jacob Smithassigns product named Tissue paper to supplier named Jacob Smith
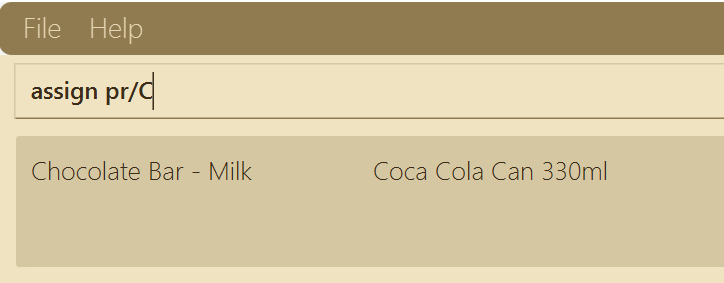
After typing the prefixes pr/ or su/, press the Tab key on your keyboard. Typing some characters after pr/ or su/ will display matching supplier or product names, helping you complete entries quickly and accurately.
Un-assigning a product to supplier: unassign ❌ 🙋♀️
This feature allows you to remove the assigned supplier from the previously connected product. Useful if the store manager decides to stop sourcing a particular product from a supplier or switch to a new one.
Format: unassign pr/PRODUCT_NAME
Here are a few examples to help you:
unassign pr/Tissue PaperUnassigns product namedTissue paper.
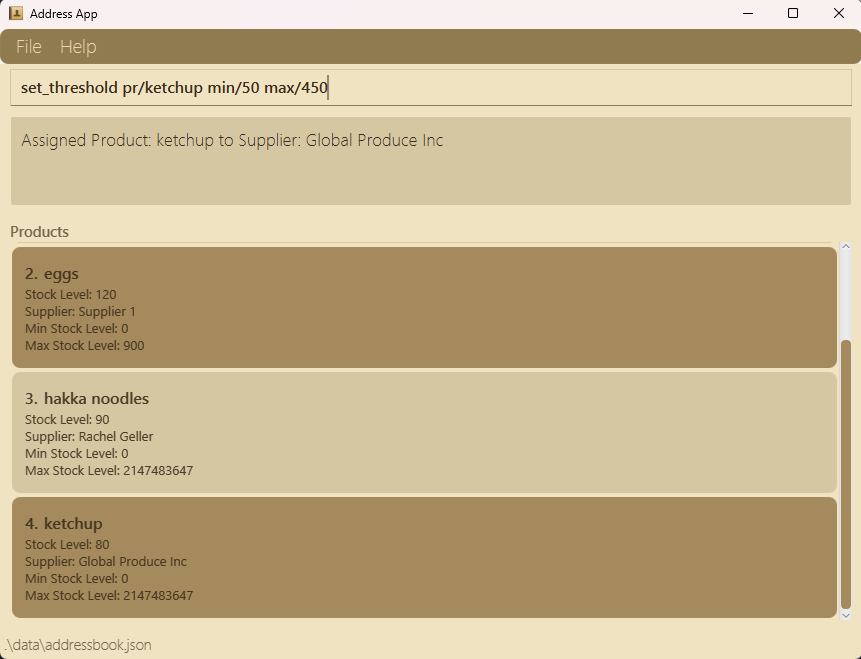
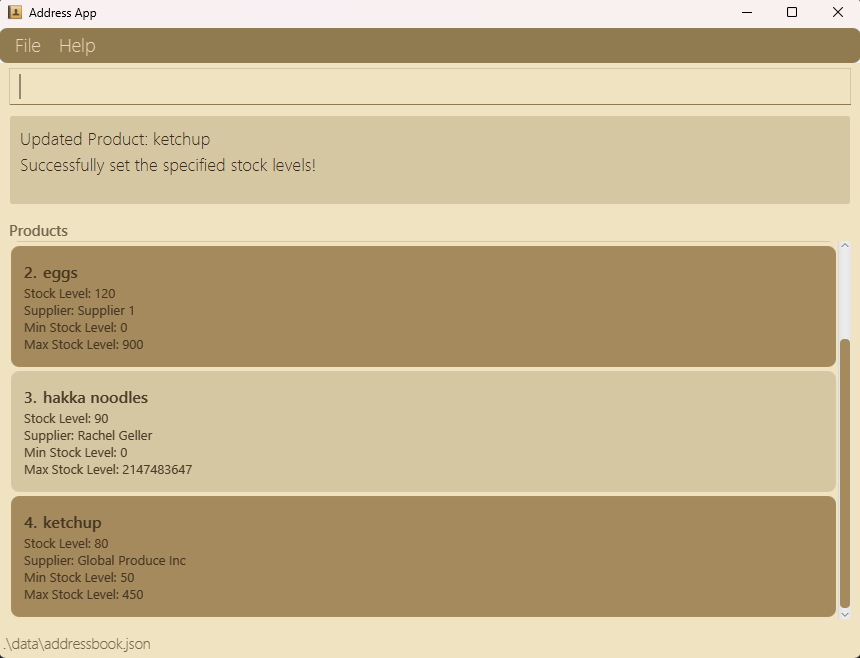
Setting threshold for a product: set_threshold ➖➕
To allocate specified space for your products,you would want to update the minimum and maximum stock level for a product, this feature does that for you!
Format: set_threshold pr/PRODUCT_NAME [min/MIN_STOCK_LEVEL] max/MAX_STOCK_LEVEL OR set_threshold pr/PRODUCT_NAME min/MIN_STOCK_LEVEL [max/MAX_STOCK_LEVEL]
Here are a few examples to help you:
set_threshold pr/potato chips min/100set_threshold pr/chocolates max/230set_threshold pr/sweater min/380 max/900
- At least one of the prefixes is mandatory:
min/ORmax/. min/ANDmax/can be used together as well.
Updating stock level for a product: update_stock 📈📦📉
Stock level always seem to change after the purchases are done for the day, hence this feature lets you update the current stock level for the product.
Format: update_stock pr/PRODUCT_NAME stk/STOCK_LEVEL
Here are a few examples to help you:
update_stock pr/sweater stk/1000update_stock pr/chocolates stk/2623900
- Stock levels must be a number equal to or above 0 (zero).
- Products should already exist in the system, otherwise errors will be displayed.
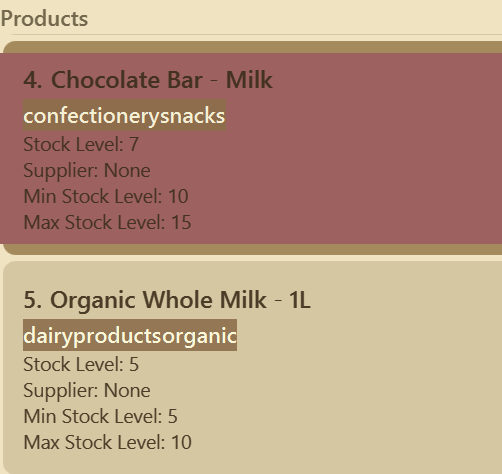
Locating all suppliers: view_supplier 🔎🙋♀️
If you want to look through your current list of suppliers, view feature helps you to do it in 3-4 ways -
- See All the suppliers currently present in the supplier list.
- See the specified suppliers with the keyword provided.
- Suppliers filtered by tags.
Format:
view_supplier (For displaying details of all suppliers)
view_supplier n/KEYWORD (For displaying specified suppliers matched with the keyword)
view_supplier t/TAG... (For displaying details about filtered suppliers with specified tags)
view_supplier n/KEYWORD t/TAG... (For displaying details about filtered suppliers with specified tag(s) and matched with the keyword)
Here are a few examples to help you:
view_supplierview_supplier n/Sussaneview_supplier t/reliableview_supplier n/Sussane t/reliable
Locating all products: view_product 🔎📦
If you want to look through your current list of products, view feature helps you to do it in 5 ways -
- See All the products currently present in the product list.
- See the specified products with the keyword provided.
- Products filtered by tags.
- Products filtered by supplier.
- Products sorted by proximity of stock level from minimum threshold (stockLevel - minStockLevel) in increasing or decreasing order.
Format:
view_product (For displaying details of all products)
view_product [n/NAME] [t/TAG]... [su/SUPPLIER_NAME] [sort/i|sort/d] (For displaying details about specified products)
Here are a few examples to help you:
view_productview_product su/Best Supplierview_product n/chocolateview_product n/chocolate t/dessertview_product n/chocolate t/dessert su/Best Supplierview_product n/chocolate t/dessert su/Best Supplier sort/dview_product t/dessertview_product t/dessert sort/iview_product t/dessert su/Best Supplier
sort functionality can be used to easily see which products require immediate restocking, or if done in reverse, the products which are well above the minimum stock and aren't selling well.
Deleting a supplier: delete_supplier ⛔🙋♀️
If a supplier does not supply products anymore, you can delete their information from the Supplier List, using this delete feature.
Format: delete_supplier su/SUPPLIER_NAME
Examples:
delete_supplier su/Jack Mollydelete_supplier su/Kayla Beauty
- Suppliers should already exist in the system, otherwise errors are displayed.
- When deleting an existing supplier, any products that have been assigned this deleted supplier will have their assigned supplier removed. However, you will need to use the `view_product` command for the application to reflect this change.
Deleting a product: delete_product ⛔🧶
If you want to delete a product from the Product List, this command will help you do that.
Format: delete_product pr/PRODUCT_NAME
Here are a few examples to help you:
delete_product pr/sweaterdelete_product pr/ramen noodles
- Products should already exist in the system, otherwise errors are displayed.
Clearing all entries : clear 🧹🗂️
Clears all information about products and suppliers from the system permanently.
Format: clear
- There is no way to restore the information once cleared, so kindly think twice before executing this action!
Exiting the program : exit 🚪👋
Exits from the program once all your tasks related to updating stocks, editing suppliers and product info etc. are done!
Format: exit
Saving the data 🔐
InvenTrack data are saved in the hard disk automatically after executing any command that changes the data. There is no need to save manually.
Editing the data file 📝
AddressBook data are saved automatically as a JSON file [JAR file location]/data/addressbook.json. Advanced users are welcome to update data directly by editing that data file.
- If your changes to the data file make its format invalid, AddressBook will discard all data and start with an empty data file at the next run. It is recommended to take a backup of the file before editing it.
- Certain edits can cause the AddressBook to behave in unexpected ways (e.g., if a value entered is outside the acceptable range). Therefore, edit the data file only if you are confident that you can update it correctly.
Upcoming Features
- Update Max Stock Level for a particular supplier's products
[coming in v2.0]
Details coming soon ...
FAQ
Q: How do I transfer my data to another Computer?
A: Install the app in the other computer and overwrite the empty data file it creates the file that contains the data of your previous AddressBook home folder.
Q: Why can we add stock level more than the maximum stock level(maximum threshold)?
A: MAX_STOCK_LEVEL is the intended number of products you would like to have in your store for a particular product when you restock. This is to help tell the supplier what quantity is required.
It might happen that CURRENT_STOCK_LEVEL maybe greater than this number because of greater number of purchase order. This helps to suit real world implementation.
Q: Why do we have n/ and pr/ and su/ prefixes if they almost fulfill the same purpose?
A: n/ prefix is used for the products and supplier names who are to be newly added to the system. But pr/ and su/ prefixes are for the commands for which the products and suppliers already exist in the system. This differentiating value helps in abstraction!
Known issues
- When using multiple screens, if you move the application to a secondary screen, and later switch to using only the primary screen, the GUI will open off-screen. The remedy is to delete the
preferences.jsonfile created by the application before running the application again. - If you minimize the Help Window and then run the
helpcommand (or use theHelpmenu, or the keyboard shortcutF1) again, the original Help Window will remain minimized, and no new Help Window will appear. The remedy is to manually restore the minimized Help Window.
Command summary 📋
| Action | Format, Examples |
|---|---|
| Add Supplier | add_supplier n/NAME p/PHONE_NUMBER e/EMAIL a/ADDRESS [t/TAG]…e.g., add_supplier n/Fresh Farms Ltd p/98765432 e/contact@freshfarms.com a/Orchard St, Suite 5 |
| Add Product | add_product n/NAME [st/STOCK_LEVEL] [su/SUPPLIER_NAME] [t/TAG]…e.g., add_product n/Tissue Paper st/500 su/Global Produce |
| Assign Product | assign pr/PRODUCT_NAME su/SUPPLIER_NAMEe.g., assign pr/Tissue Paper su/Fresh Farms Ltd |
| Unassign Product | unassign pr/PRODUCT_NAME e.g., unassign pr/Tissue Paper |
| Set Threshold | set_threshold pr/PRODUCT_NAME [min/MIN_STOCK_LEVEL] max/MAX_STOCK_LEVEL or set_threshold pr/PRODUCT_NAME min/MIN_STOCK_LEVEL [max/MAX_STOCK_LEVEL]e.g., set_threshold pr/Tissue Paper min/100 max/1000 |
| Update Stock | update_stock pr/PRODUCT_NAME stk/STOCK_LEVELe.g., update_stock pr/Tissue Paper stk/300 |
| View Suppliers | view_supplier [n/KEYWORD] [t/TAG]...e.g., view_supplier or view_supplier Fresh |
| View Products | view_product [n/NAME] [t/TAG]... [su/SUPPLIER_NAME] [sort/i|sort/d] e.g., view_product Tissue or view_product t/household sort/i |
| Delete Supplier | delete_supplier su/SUPPLIER_NAMEe.g., delete_supplier su/Global Produce |
| Delete Product | delete_product pr/PRODUCT_NAMEe.g., delete_product pr/Tissue Paper |
| Autocomplete | Press tab to execute this feature while writing commands. |
| Clear All | clear |
| Help | help |
| Exit | exit |

